As you can see, the pan is empty.
It's empty because these are delicious. They are addicting.
I first had a Nanaimo Bar (charmingly named after the city of Nanaimo, British Columbia) on the shores of Lake Bennett. One of my sisters, two friends, and I had just finished hiking the Chilkoot Trail and a group of Canadians we had befriended on the trail offered us some of their dessert.
"It's famous!" they exclaimed. "They're amazing!" they promised.
Decadently layered with chocolate, coconut, custard; indeed, they were.
Nanaimo Bars (original recipe here)
Serves 12
1 1/4 cups unsalted butter
1/4 cup sugar
5 tbs. cocoa powder
1 egg, beaten
1 1/4 cups crushed graham crackers
1/2 cup almond meal
1 cup unsweetened coconut
2 tbs + 2 tsp heavy cream
2 tbs vanilla pudding powder
2 cups powdered sugar
8 squares (8 oz) semi-sweet chocolate
1. Melt 1/2 cup butter, 1/4 cup sugar, and 5 tbs cocoa in a double broiler. Add egg and cook slightly to thicken. Remove from heat. Stir in graham cracker crumbs, coconut, and almond meal. Press firmly into an ungreased 8x8" pan.
2. Cream 1/2 cup butter, cream, pudding powder, and powdered sugar. Beat until light. Spread over the bottom layer.
3. Completely melt 1/4 cup butter and 8 oz chocolate over low heat in a double boiler. Cool. Once cool, but still liquid, pour over the second layer and chill in the refrigerator to set.
4. To serve, remove from refrigerator and allow to sit at room temperature for about 2 hours.*
*These can be eaten right from the refrigerator, but they are much, much better when they have warmed up a bit. The custard layer becomes stiff when the bars are cold. At room temperature, the custard filling is silky and smooth.
Friday, April 25, 2014
Wednesday, April 23, 2014
On the Menu: Rappie Pie
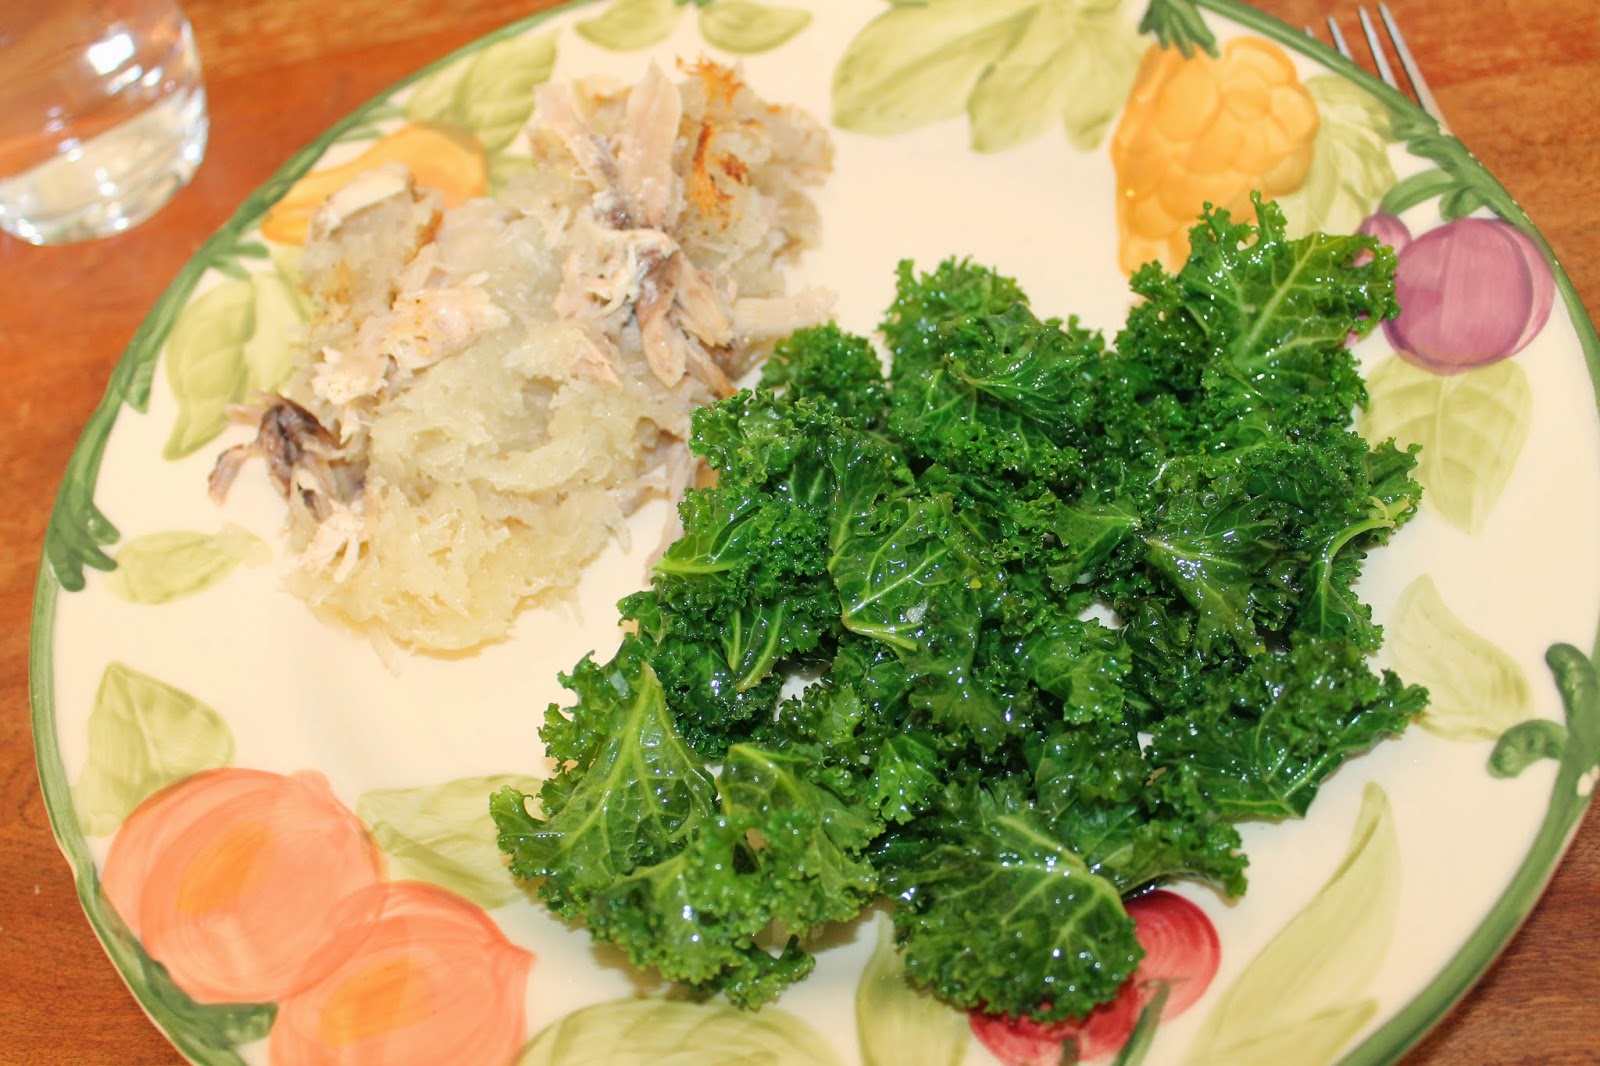
"How come Canadian food looks so grey?" Robinson complained.
It's a valid complaint: the poutine looked grey because of the gravy and the Rappie Pie was grey because of the potatoes. Grey food does look rather unappetizing, doesn't it?
A word of advice: this dish is in some serious need of some spices. Salt and pepper, mostly, but you couldn't go wrong with a pick-me-up from a little thyme, savory, or marjoram.
So far, this has been my least favorite meal, but by no fault of it's own. Apparently, after the Acadian Expulsion had been lifted and native groups returned to southeastern Canada, their traditional lands had been given to immigrants. The remaining land was good for growing potatoes and the Acadians added meat to these potatoes to create this dish.
The potatoes are soaked in water and squeezed dry as much as possible before being mixed with chicken broth. The chicken is sandwiched between the potatoes and is then baked. It's a simple recipe, but a lot of work, with not such great results. I'd be curious to go to Nova Scotia someday to see if their Rappie Pie is any better.
Rappie Pie (original recipe here)
Serves 6
3 lbs chicken, cooked and shredded
2-3 cups chicken broth (homemade or canned)
5 large potatoes
5 tbs butter, divided
salt and pepper, to taste
1. Fill a large bowl or pot with water. Peel potatoes, putting the peeled ones into the bowl of water to prevent them from turning black.
2. Grate potatoes into a large bowl of water. When all of the potatoes have been grated, squeeze out as much water as possible. Place in another large bowl.
3. Preheat oven to 400 degrees. Grease an 8x8 casserole dish with 2 tbs butter. Place half of the potatoes on the bottom of the dish. Generously season with salt and pepper.
4. Top potatoes with chicken. Top chicken with the rest of the potatoes. Generously sprinkle with more salt and pepper.
5. Pour 2-3 cups of chicken broth on top of the casserole and dot with the remaining butter. Bake for about 1 1/2 hours.
It's a valid complaint: the poutine looked grey because of the gravy and the Rappie Pie was grey because of the potatoes. Grey food does look rather unappetizing, doesn't it?
A word of advice: this dish is in some serious need of some spices. Salt and pepper, mostly, but you couldn't go wrong with a pick-me-up from a little thyme, savory, or marjoram.
So far, this has been my least favorite meal, but by no fault of it's own. Apparently, after the Acadian Expulsion had been lifted and native groups returned to southeastern Canada, their traditional lands had been given to immigrants. The remaining land was good for growing potatoes and the Acadians added meat to these potatoes to create this dish.
The potatoes are soaked in water and squeezed dry as much as possible before being mixed with chicken broth. The chicken is sandwiched between the potatoes and is then baked. It's a simple recipe, but a lot of work, with not such great results. I'd be curious to go to Nova Scotia someday to see if their Rappie Pie is any better.
Rappie Pie (original recipe here)
Serves 6
3 lbs chicken, cooked and shredded
2-3 cups chicken broth (homemade or canned)
5 large potatoes
5 tbs butter, divided
salt and pepper, to taste
1. Fill a large bowl or pot with water. Peel potatoes, putting the peeled ones into the bowl of water to prevent them from turning black.
2. Grate potatoes into a large bowl of water. When all of the potatoes have been grated, squeeze out as much water as possible. Place in another large bowl.
3. Preheat oven to 400 degrees. Grease an 8x8 casserole dish with 2 tbs butter. Place half of the potatoes on the bottom of the dish. Generously season with salt and pepper.
4. Top potatoes with chicken. Top chicken with the rest of the potatoes. Generously sprinkle with more salt and pepper.
5. Pour 2-3 cups of chicken broth on top of the casserole and dot with the remaining butter. Bake for about 1 1/2 hours.
Monday, April 21, 2014
On the Menu: Soupe aux pois with Bannock
My father is a fairly predictable person. When I was a girl, Dad always made turkey tetrazzini after Thanksgiving and he always made split pea soup after Easter. Needless to say, my capacity for casseroles and pea soups is almost full. I don't make either one often.
However, I can say with some confidence that I will be making Soupe aux Pois again. It is, basically, split pea soup, but made with yellow peas instead of green. The yellow peas impart a more mild, sweet flavor than traditional green. I may never use green peas in soups again!
Bannock is an indigenous bread, similar to the Eskimo doughnuts (Inupiat) or Navaho fry bread. Every once in a while, we would get Eskimo doughnuts for hot lunch at school. They were my favorite. I've been looking for a fry bread recipe for some time now, but have not been very successful. The first recipe I used produced a very dense, tasteless bread so I tweaked the recipe. The result was something more palatable, but I'm still not completely satisfied with the texture. Perhaps one of these days I'll go back and fiddle with the recipe some more.
Soupe aux Pois (original recipe here)
Serves 8
1/4 lb boneless ham, finely chopped
1/4 lb salt pork, finely chopped (bacon is a good substitute)
2 tbs butter
2 carrots, diced
2 stalks celery, diced
1 onion, diced
2 cloves garlic, minced
2 cups dried yellow split peas
1 tsp savory
salt and pepper, to taste
1. In a large Dutch oven, melt butter. Add carrots, celery, onion, and garlic. Cook, stirring occasionally, until the vegetables are soft.
2. Stir in split peas, ham, salt pork, and savory. Cook for about 2 minutes.
3. Add 6 cups water. Bring to a boil and simmer for about 2 hours, or until everything is soft and the peas have begun to fall apart.
4. Add salt and pepper to taste. Serve hot.
Bannock
Makes about 10 fry breads
2 cups all-purpose flour
1 tbs baking powder
2 tbs sugar
1 tsp salt
2 tbs oil
1/2 cup milk
1/2 cup water
4 cups oil (for frying)
1. Heat oil to about 350 degrees.
2. Mix all of the dry ingredients together.
3. Add the wet ingredients; mix well. Knead a few times on a floured surface. Dough will be sticky.
4. Form a golf-ball sized piece of dough into a ball, then flatten so that it is thinner in the middle and thicker along the edges. Place in hot oil and fry until nicely browned on one side. Flip over to cook on the other side. Repeat with remaining dough. Serve warm.
However, I can say with some confidence that I will be making Soupe aux Pois again. It is, basically, split pea soup, but made with yellow peas instead of green. The yellow peas impart a more mild, sweet flavor than traditional green. I may never use green peas in soups again!
Bannock is an indigenous bread, similar to the Eskimo doughnuts (Inupiat) or Navaho fry bread. Every once in a while, we would get Eskimo doughnuts for hot lunch at school. They were my favorite. I've been looking for a fry bread recipe for some time now, but have not been very successful. The first recipe I used produced a very dense, tasteless bread so I tweaked the recipe. The result was something more palatable, but I'm still not completely satisfied with the texture. Perhaps one of these days I'll go back and fiddle with the recipe some more.
Soupe aux Pois (original recipe here)
Serves 8
1/4 lb boneless ham, finely chopped
1/4 lb salt pork, finely chopped (bacon is a good substitute)
2 tbs butter
2 carrots, diced
2 stalks celery, diced
1 onion, diced
2 cloves garlic, minced
2 cups dried yellow split peas
1 tsp savory
salt and pepper, to taste
1. In a large Dutch oven, melt butter. Add carrots, celery, onion, and garlic. Cook, stirring occasionally, until the vegetables are soft.
2. Stir in split peas, ham, salt pork, and savory. Cook for about 2 minutes.
3. Add 6 cups water. Bring to a boil and simmer for about 2 hours, or until everything is soft and the peas have begun to fall apart.
4. Add salt and pepper to taste. Serve hot.
Bannock
Makes about 10 fry breads
2 cups all-purpose flour
1 tbs baking powder
2 tbs sugar
1 tsp salt
2 tbs oil
1/2 cup milk
1/2 cup water
4 cups oil (for frying)
1. Heat oil to about 350 degrees.
2. Mix all of the dry ingredients together.
3. Add the wet ingredients; mix well. Knead a few times on a floured surface. Dough will be sticky.
4. Form a golf-ball sized piece of dough into a ball, then flatten so that it is thinner in the middle and thicker along the edges. Place in hot oil and fry until nicely browned on one side. Flip over to cook on the other side. Repeat with remaining dough. Serve warm.
Sunday, April 20, 2014
On the Menu: Poutine
I'm going to let you in on a secret.
Poutine sounds really, really bizarre, but in actuality it is amazing.
Really, really amazing.
Poutine is originally from Quebec (thus the French-sounding name), but when I traveled though the Northwest Territories on my way to the Chilkoot Trail, it was on the menu at almost every little restaurant we stopped. It truly is a Canadian dish.
Given the number of times I've been through Canada, it's surprising I've never had poutine before. But it's such a simple combination; just french fries smothered with cheese curds and gravy; that I decided to have a go and make up my own recipe.
It was divine.
I'd even consider adding sausage to the gravy or eating it for breakfast. Or lunch. Or dinner. Anytime, really. It's that good.
Poutine
Serves 4
2 tbs butter
2 tbs flour
2 cups milk
1/4 lb cheese curds (cut small)
1 10 oz bag french fries (we used thin and crispy but any kind will do)
salt and pepper, to taste
1. Prepare french fries according to package directions.
2. Melt butter in a large saucepan. Once completely melted, mix in flour to make a roux.
3. Add milk a little at a time, whisking well after each addition. The gravy should be smooth, not lumpy. Continue to add a little bit of milk to the gravy until the milk is gone. Sprinkle with salt and pepper, to taste.
4. Once the fries are done, sprinkle liberally with cheese curds, then top with gravy. Eat immediately.
Poutine sounds really, really bizarre, but in actuality it is amazing.
Really, really amazing.
Poutine is originally from Quebec (thus the French-sounding name), but when I traveled though the Northwest Territories on my way to the Chilkoot Trail, it was on the menu at almost every little restaurant we stopped. It truly is a Canadian dish.
Given the number of times I've been through Canada, it's surprising I've never had poutine before. But it's such a simple combination; just french fries smothered with cheese curds and gravy; that I decided to have a go and make up my own recipe.
It was divine.
I'd even consider adding sausage to the gravy or eating it for breakfast. Or lunch. Or dinner. Anytime, really. It's that good.
Poutine
Serves 4
2 tbs butter
2 tbs flour
2 cups milk
1/4 lb cheese curds (cut small)
1 10 oz bag french fries (we used thin and crispy but any kind will do)
salt and pepper, to taste
1. Prepare french fries according to package directions.
2. Melt butter in a large saucepan. Once completely melted, mix in flour to make a roux.
3. Add milk a little at a time, whisking well after each addition. The gravy should be smooth, not lumpy. Continue to add a little bit of milk to the gravy until the milk is gone. Sprinkle with salt and pepper, to taste.
4. Once the fries are done, sprinkle liberally with cheese curds, then top with gravy. Eat immediately.
Saturday, April 19, 2014
Canada Week: The Menu
In some ways, Canada is a lot like the United States. The country is so huge geographically that picking just one meal that defines Canada is a lot like trying to choose a truly American meal.
Additionally, like the United States, certain foods are popular in certain regions due to their historical or cultural importance. (For example, there is a large population of indigenous people who practice subsistence - which means some quintessential Canadian meals are made from seal, berries, caribou, or fish.)
It was difficult choosing Canadian dishes because Canadian food is so similar to the United States. We managed to pick a few meals that were just different enough from cuisine you find in the United States and things that I did not make very often (if at all).
This week we will be eating:
Alternative Menu Ideas:
Additionally, like the United States, certain foods are popular in certain regions due to their historical or cultural importance. (For example, there is a large population of indigenous people who practice subsistence - which means some quintessential Canadian meals are made from seal, berries, caribou, or fish.)
It was difficult choosing Canadian dishes because Canadian food is so similar to the United States. We managed to pick a few meals that were just different enough from cuisine you find in the United States and things that I did not make very often (if at all).
This week we will be eating:
Poutine
Soupe aux pois with Bannock
Rappie Pie
Rappie Pie
Nanaimo Bars
Calgary-style Ginger Beef
Smoked meat
Beaver Tails
Smoked meat
Beaver Tails
Friday, March 21, 2014
On the Menu: Medovik
Nothing.
Medovik is a Russian honey cake with multiple layers and a sour cream-sugar frosting in between. The cake sits for a few hours on the counter or overnight in the refrigerator so that the frosting melts into the cake. The cake becomes soft and chewy, rather like a brownie.
You can sprinkle the top with chocolate shavings or nuts, but I opted to keep it plain, served with a bit of leftover frosting. I think it would also be very good with a bit of strawberry syrup or fresh berries.
The cake itself was a bit of work - mostly because of the layers - but it is well worth it. I halved the original recipe because it would have made too much cake for only four people and I can't stand to waste food.
Medovik (original recipe here)
Serves 8-10
For the cake:
5 egg yolks, at room temperature
1/4 cup sugar
1/4 cup butter
1/4 cup honey
3/4 tsp baking soda
1 3/4 cups + 2 tbs all-purpose flour
For the frosting:
16 oz sour cream
3/4 cup sugar
1. For the cake: Preheat oven to 400 degrees. Line a large cookie sheet or pizza pan with parchment paper.
2. Add egg yolks and sugar to a mixing bowl and beat well until sugar has dissolved.
3. Melt butter and pour into another mixing bowl.
4. Add honey to the saucepan and heat until it starts to boil. Add the baking soda. The mixture will start to bubble and rise. Mix for about 20 seconds, until it gets a nice golden color. Do not let it turn orange! Take the honey mixture off the stove and mix well with the butter.
5. Add the egg yolk mixture to the honey mixture and stir well.
6. Add the flour to the egg yolk mixture, a few tablespoons at a time, and stir well.
7. Divide the dough into four equal logs.
8. Press one log onto the cookie sheet until the bottom of the sheet is covered with the dough. The dough should be very, very thin - about 1/8" thick. Bake for 5 minutes. Let cool on a wire rack.
9. Repeat with remaining dough.
10. For the frosting: Mix sour cream and sugar until combined. Let sit for about eight minutes, or until sugar has dissolved.
Assembly:
1. Cut the cake layers in half. Place one layer on a plate, small cookie sheet, or decorative platter.
2. Spread generous layer of sour cream frosting over the cake layer. Top with another cake layer. It's okay if the frosting drips down the sides of the cake.
3. Repeat with remaining layers. You may have some sour cream frosting leftover (which you can use to make another cake or sour cream brownies!)
4. Place cake in the refrigerator for at least four hours or overnight. The cake is still delicious even after stored in the refrigerator for a few days!
Thursday, March 20, 2014
On the Menu: Piroshki
The piroshki: Russian comfort food at its best.Even our picky little Balin ate more than half of his.
Piroshki can be filled with any number of things: ground meats, rice, potatoes, onions, bacon...even chocolate and fruits for a dessert.
Since this was our vegetarian meal, our piroshki would be filled with potatoes, mushrooms, and onions. (Though someday I'd like to make meat-filled piroshki - sausage, mushroom, and onion in a Worcestershire sauce, maybe? Or a bacon, onion, and potato-stuffed piroshki with some red wine vinegar?)
Out of all the recipes I examined, I liked this one the most. The dough was delightfully soft and the filling was spiced perfectly. The author claims that you can fry these as well as bake them, but I've only ever baked them. I followed the original recipe faithfully, except for substituting Greek yogurt for the sour cream the second time I made them. The dough was still amazing.
I also found that the ratio of dough to filling was a bit off - that there was too much filling to dough. The second time I made these, I halved the filling and there was just enough. Feel free to play around with the ratios.
Piroshki (original recipe here)
Makes about 10
For the dough:
2 cups milk
4 cups + 8 tbs flour
2 eggs
2 tbs sour cream or Greek yogurt
2 tbs oil (I used olive)
1 tbs yeast
1 1/4 tsp salt
1/4 tsp sugar
For the filling:
3 medium potatoes, peeled, cooked, and mashed
1 small onion, finely chopped
1/2 stick butter
1 tbs olive oil
3/4 cup dried shiitake mushrooms, soaked in boiling water, drained, and chopped
salt and pepper, to taste
2 tbs finely chopped fresh dill or 1-2 tsp dried dill (optional)
1. For the dough: Whisk together 1 cup warm milk, 1/4 tsp salt, sugar, yeast, and 8 tbs flour in a large bowl. Cover and set aside for 10 minutes. It should rise and be foamy.
2. Meanwhile, mix together 1 cup warm milk, sour cream or yogurt, oil, eggs, and 1 tsp salt. Add 2 1/2 cups flour and mix together.
3. Add the foamy yeast mixture and combine. Then add the rest of the flour. Mix well.
4. Cover the bowl and place in a warm place until doubled in size, about 1 hour.
5. For the filling: Add olive oil and butter to a pan over medium-high heat. When the butter melts, add the onions. Saute until they have a carmel color.
6. Add the mushrooms and cook for another five minutes, stirring occasionally. Add salt and pepper to taste. Add dill, if desired.
7. Mix the onion mixture with the mashed potatoes and stir well.
Assembly:
1. Preheat oven to 350 degrees.
2. Cut a piece of dough about the size of a racquetball and place it on a well-floured surface. The dough will be very sticky, so use extra flour or a bit of oil to keep it from sticking to your fingers. Flatten the dough a bit.
3. Put about 1 1/2 - 2 tbs of the filling in the center of the flattened dough. Carefully pinch the sides together.
4. Place on a baking sheet, seam side down. Make the rest of the piroshki. The prioshki will expand in the oven, so space them accordingly.
5. Bake* for about 20 minutes, or until the tops are golden brown.
6. Serve by themselves or with melted butter and garlic.
* Check out the original recipe (here) for instructions on how to fry these.
Subscribe to:
Posts (Atom)