Showing posts with label recipes. Show all posts

Tuesday, May 20, 2014

On the Menu: Kaesespaetzle

There's nothing more comforting than macaroni and cheese, right?

What about macaroni and cheese made with swiss, caramelized onions, and egg noodles?

I'd call that pure decadence.

Although there's a bit of prep work involved, this is one of the simplest dishes I've prepared and (bonus!) only requires four ingredients: butter, cheese, spaetzle, and onions. The key, I think, is caramelizing the onions.

Kaesespaetzel
Serves 4-6

1 1/2 cups dried spaetzel
1/2 lb Swiss cheese (Emmental is another good choice), grated
2 onions, sliced thin
2 tbs unsalted butter, plus extra for greasing
salt and pepper, to taste

1. Cook spaetzel according to package directions. Drain.
2. Melt butter in a large saucepan and saute onions. Cook until nicely browned, about 15 minutes. Season generously with salt and pepper.
3. Preheat oven to 350 degrees. Grease an 8x8" casserole dish.
4. Pour half of the spaetzel into the casserole dish. Put half the onions on top of the spaetzel. Put half of the cheese on the onions. Repeat layers with the rest of the ingredients.
5. Bake for about 20-25 minutes, or until bottom is bubbly. Serve hot.

Sunday, May 18, 2014

On the Menu: German Baked Beans

This experiment has already been interesting and it's been great to see the kids trying new foods and learning about various countries.

To be honest, I'm not quite sure how "German" these baked beans are - would a German from Germany actually recognize it as local cuisine? - but considering they were the only bean dish we could find, I was willing to bend.

These beans have two staples in German food: sauerkraut and apples. Not in a million years would I have thought to put sauerkraut in baked beans, but they offer a surprisingly nice tang to the dish. And the apples, of course, give it an excellent sweetness almost reminiscent of a dessert.

To make this dish, I modified a favorite baked beans recipe. I may make this dish again and tweak it because it was a tad too sweet. If you are worried about the dish being too sweet, decrease the amount of molasses, increase the amount of water, and use unsweetened applesauce.

German Baked Beans 
Adapted from: The Bacon Cookbook by James Villas
Makes 6 main dish servings or 8-10 side dish servings

2 cups dried beans (navy or small white beans work best)
1/2 onion
2 whole cloves
1/2 tsp baking soda
1/4 lb bacon, chopped
1 tbs salt
1 tbs rum
1 tsp dried mustard
1 16 oz jar sauerkraut, well drained
3/4 cup molasses (can be reduced to 1/2 cup)
1 cup unsweetened applesauce

1. Soak beans in water for about 8 hours.
2. Pierce onion half with the cloves. Put into the pot with the beans and the baking soda. Bring to a boil. Cook for 15 minutes.
3. Preheat oven to 325 degrees.
4. Drain beans into a 3-4 quart casserole dish, reserving 2-3 cups of the bean water. Add bacon, salt, rum, dried mustard, sauerkraut, molasses, applesauce, and 2 cups of bean water. Mix well.
5. Cover and put in oven. Bake for about 3-4 hours, checking every couple of hours to add water as needed.

Friday, April 25, 2014

On the Menu: Nanaimo Bars

As you can see, the pan is empty.

It's empty because these are delicious. They are addicting.

I first had a Nanaimo Bar (charmingly named after the city of Nanaimo, British Columbia) on the shores of Lake Bennett. One of my sisters, two friends, and I had just finished hiking the Chilkoot Trail and a group of Canadians we had befriended on the trail offered us some of their dessert.

"It's famous!" they exclaimed. "They're amazing!" they promised.

Decadently layered with chocolate, coconut, custard; indeed, they were.

Nanaimo Bars (original recipe here)
Serves 12

1 1/4 cups unsalted butter
1/4 cup sugar
5 tbs. cocoa powder
1 egg, beaten
1 1/4 cups crushed graham crackers
1/2 cup almond meal
1 cup unsweetened coconut
2 tbs + 2 tsp heavy cream
2 tbs vanilla pudding powder
2 cups powdered sugar
8 squares (8 oz) semi-sweet chocolate

1. Melt 1/2 cup butter, 1/4 cup sugar, and 5 tbs cocoa in a double broiler. Add egg and cook slightly to thicken. Remove from heat. Stir in graham cracker crumbs, coconut, and almond meal. Press firmly into an ungreased 8x8" pan.
2. Cream 1/2 cup butter, cream, pudding powder, and powdered sugar. Beat until light. Spread over the bottom layer.
3. Completely melt 1/4 cup butter and 8 oz chocolate over low heat in a double boiler. Cool. Once cool, but still liquid, pour over the second layer and chill in the refrigerator to set.
4. To serve, remove from refrigerator and allow to sit at room temperature for about 2 hours.*

*These can be eaten right from the refrigerator, but they are much, much better when they have warmed up a bit. The custard layer becomes stiff when the bars are cold. At room temperature, the custard filling is silky and smooth.

Wednesday, April 23, 2014

On the Menu: Rappie Pie

"How come Canadian food looks so grey?" Robinson complained.

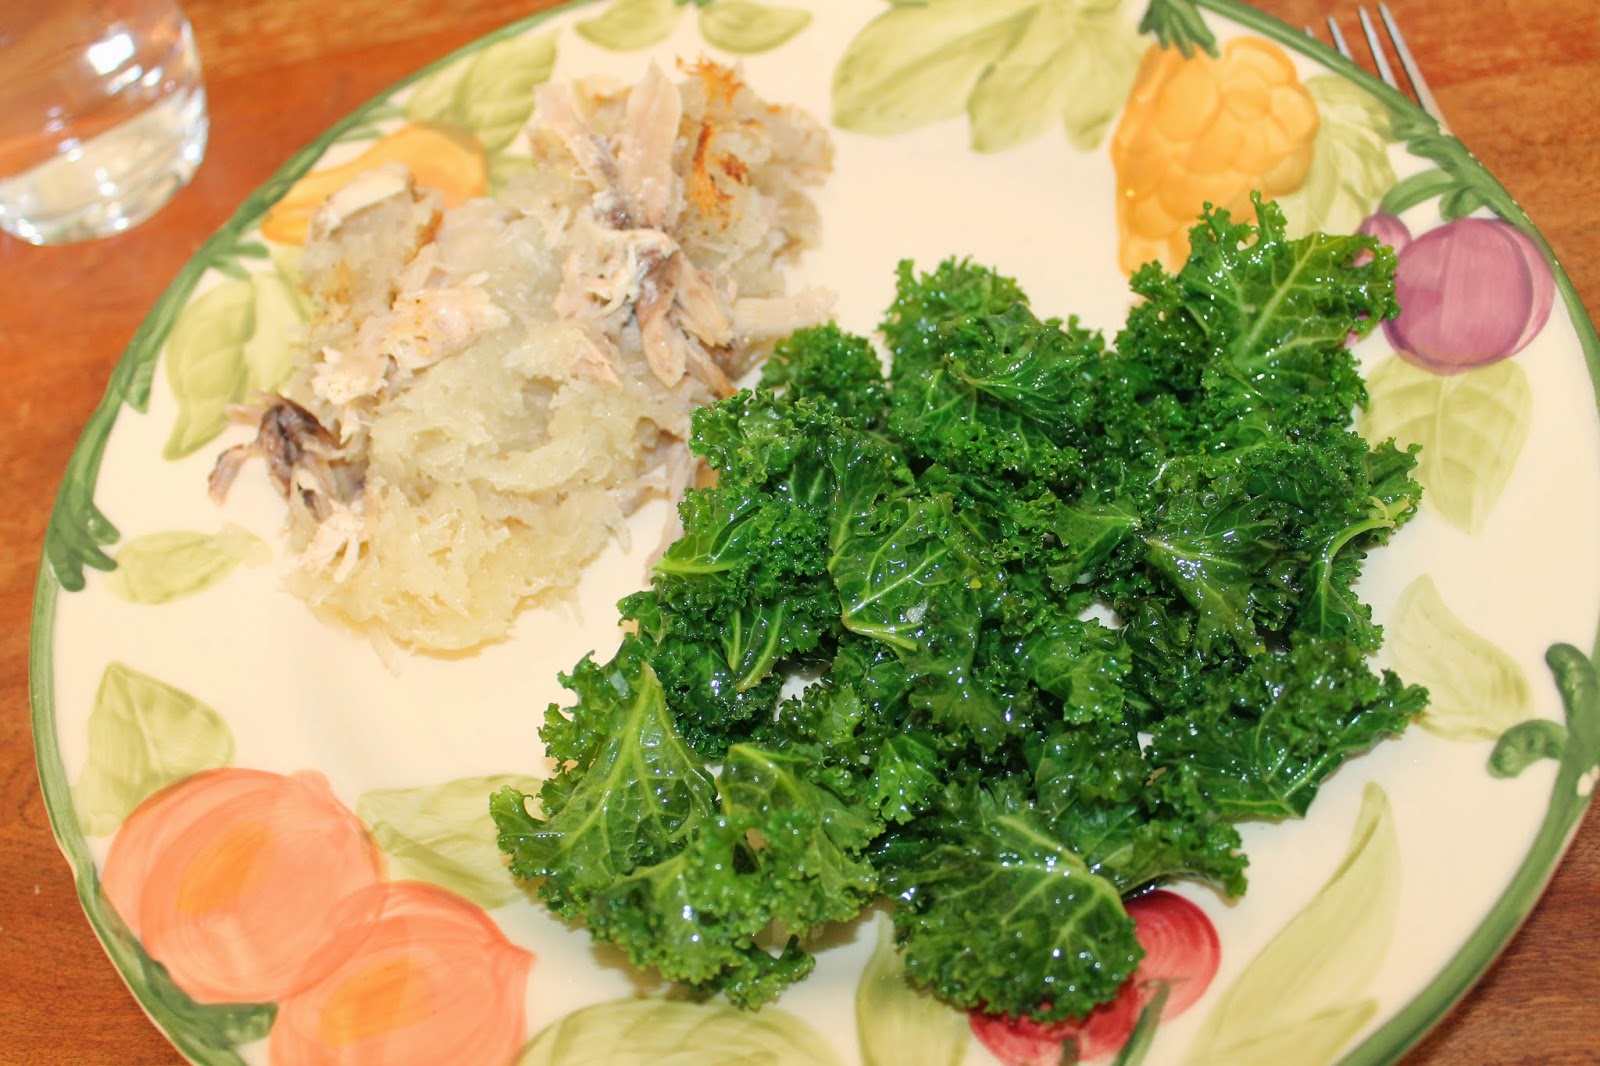
It's a valid complaint: the poutine looked grey because of the gravy and the Rappie Pie was grey because of the potatoes. Grey food does look rather unappetizing, doesn't it?

A word of advice: this dish is in some serious need of some spices. Salt and pepper, mostly, but you couldn't go wrong with a pick-me-up from a little thyme, savory, or marjoram.

So far, this has been my least favorite meal, but by no fault of it's own. Apparently, after the Acadian Expulsion had been lifted and native groups returned to southeastern Canada, their traditional lands had been given to immigrants. The remaining land was good for growing potatoes and the Acadians added meat to these potatoes to create this dish.

The potatoes are soaked in water and squeezed dry as much as possible before being mixed with chicken broth. The chicken is sandwiched between the potatoes and is then baked. It's a simple recipe, but a lot of work, with not such great results. I'd be curious to go to Nova Scotia someday to see if their Rappie Pie is any better.

Rappie Pie (original recipe here)
Serves 6

3 lbs chicken, cooked and shredded
2-3 cups chicken broth (homemade or canned)
5 large potatoes
5 tbs butter, divided
salt and pepper, to taste

1. Fill a large bowl or pot with water. Peel potatoes, putting the peeled ones into the bowl of water to prevent them from turning black.
2. Grate potatoes into a large bowl of water. When all of the potatoes have been grated, squeeze out as much water as possible. Place in another large bowl.
3. Preheat oven to 400 degrees. Grease an 8x8 casserole dish with 2 tbs butter. Place half of the potatoes on the bottom of the dish. Generously season with salt and pepper.
4. Top potatoes with chicken. Top chicken with the rest of the potatoes. Generously sprinkle with more salt and pepper.
5. Pour 2-3 cups of chicken broth on top of the casserole and dot with the remaining butter. Bake for about 1 1/2 hours.

Monday, April 21, 2014

On the Menu: Soupe aux pois with Bannock

My father is a fairly predictable person. When I was a girl, Dad always made turkey tetrazzini after Thanksgiving and he always made split pea soup after Easter. Needless to say, my capacity for casseroles and pea soups is almost full. I don't make either one often.

However, I can say with some confidence that I will be making Soupe aux Pois again. It is, basically, split pea soup, but made with yellow peas instead of green. The yellow peas impart a more mild, sweet flavor than traditional green. I may never use green peas in soups again!

Bannock is an indigenous bread, similar to the Eskimo doughnuts (Inupiat) or Navaho fry bread. Every once in a while, we would get Eskimo doughnuts for hot lunch at school. They were my favorite. I've been looking for a fry bread recipe for some time now, but have not been very successful. The first recipe I used produced a very dense, tasteless bread so I tweaked the recipe. The result was something more palatable, but I'm still not completely satisfied with the texture. Perhaps one of these days I'll go back and fiddle with the recipe some more.

Soupe aux Pois (original recipe here)
Serves 8

1/4 lb boneless ham, finely chopped
1/4 lb salt pork, finely chopped (bacon is a good substitute)
2 tbs butter
2 carrots, diced
2 stalks celery, diced
1 onion, diced
2 cloves garlic, minced
2 cups dried yellow split peas
1 tsp savory
salt and pepper, to taste

1. In a large Dutch oven, melt butter. Add carrots, celery, onion, and garlic. Cook, stirring occasionally, until the vegetables are soft.
2. Stir in split peas, ham, salt pork, and savory. Cook for about 2 minutes.
3. Add 6 cups water. Bring to a boil and simmer for about 2 hours, or until everything is soft and the peas have begun to fall apart.
4. Add salt and pepper to taste. Serve hot.


Bannock
Makes about 10 fry breads

2 cups all-purpose flour
1 tbs baking powder
2 tbs sugar
1 tsp salt
2 tbs oil
1/2 cup milk
1/2 cup water
4 cups oil (for frying)

1. Heat oil to about 350 degrees.
2. Mix all of the dry ingredients together.
3. Add the wet ingredients; mix well. Knead a few times on a floured surface. Dough will be sticky.
4. Form a golf-ball sized piece of dough into a ball, then flatten so that it is thinner in the middle and thicker along the edges. Place in hot oil and fry until nicely browned on one side. Flip over to cook on the other side. Repeat with remaining dough. Serve warm.

Sunday, April 20, 2014

On the Menu: Poutine

I'm going to let you in on a secret.

Poutine sounds really, really bizarre, but in actuality it is amazing.

Really, really amazing.

Poutine is originally from Quebec (thus the French-sounding name), but when I traveled though the Northwest Territories on my way to the Chilkoot Trail, it was on the menu at almost every little restaurant we stopped. It truly is a Canadian dish.

Given the number of times I've been through Canada, it's surprising I've never had poutine before. But it's such a simple combination; just french fries smothered with cheese curds and gravy; that I decided to have a go and make up my own recipe.

It was divine.

I'd even consider adding sausage to the gravy or eating it for breakfast. Or lunch. Or dinner. Anytime, really. It's that good.

Poutine
Serves 4

2 tbs butter
2 tbs flour
2 cups milk
1/4 lb cheese curds (cut small)
1 10 oz bag french fries (we used thin and crispy but any kind will do)
salt and pepper, to taste

1. Prepare french fries according to package directions.
2. Melt butter in a large saucepan. Once completely melted, mix in flour to make a roux.
3. Add milk a little at a time, whisking well after each addition. The gravy should be smooth, not lumpy. Continue to add a little bit of milk to the gravy until the milk is gone. Sprinkle with salt and pepper, to taste.
4. Once the fries are done, sprinkle liberally with cheese curds, then top with gravy. Eat immediately.

Friday, March 21, 2014

On the Menu: Medovik

What could be better than layers of cake with a tangy-sweet frosting?

Nothing.

Medovik is a Russian honey cake with multiple layers and a sour cream-sugar frosting in between. The cake sits for a few hours on the counter or overnight in the refrigerator so that the frosting melts into the cake. The cake becomes soft and chewy,  rather like a brownie.

You can sprinkle the top with chocolate shavings or nuts, but I opted to keep it plain, served with a bit of leftover frosting. I think it would also be very good with a bit of strawberry syrup or fresh berries.

The cake itself was a bit of work - mostly because of the layers - but it is well worth it. I halved the original recipe because it would have made too much cake for only four people and I can't stand to waste food.

Medovik (original recipe here)
Serves 8-10

For the cake:
5 egg yolks, at room temperature
1/4 cup sugar
1/4 cup butter
1/4 cup honey
3/4 tsp baking soda
1 3/4 cups + 2 tbs all-purpose flour

For the frosting:
16 oz sour cream
3/4 cup sugar

1. For the cake: Preheat oven to 400 degrees. Line a large cookie sheet or pizza pan with parchment paper.
2. Add egg yolks and sugar to a mixing bowl and beat well until sugar has dissolved.
3. Melt butter and pour into another mixing bowl.
4. Add honey to the saucepan and heat until it starts to boil. Add the baking soda. The mixture will start to bubble and rise. Mix for about 20 seconds, until it gets a nice golden color. Do not let it turn orange! Take the honey mixture off the stove and mix well with the butter.
5. Add the egg yolk mixture to the honey mixture and stir well.
6. Add the flour to the egg yolk mixture, a few tablespoons at a time, and stir well.
7. Divide the dough into four equal logs.
8. Press one log onto the cookie sheet until the bottom of the sheet is covered with the dough. The dough should be very, very thin - about 1/8" thick. Bake for 5 minutes. Let cool on a wire rack.
9. Repeat with remaining dough.
10. For the frosting: Mix sour cream and sugar until combined. Let sit for about eight minutes, or until sugar has dissolved.

Assembly:
1. Cut the cake layers in half. Place one layer on a plate, small cookie sheet, or decorative platter.
2. Spread generous layer of sour cream frosting over the cake layer. Top with another cake layer. It's okay if the frosting drips down the sides of the cake.
3. Repeat with remaining layers. You may have some sour cream frosting leftover (which you can use to make another cake or sour cream brownies!)
4. Place cake in the refrigerator for at least four hours or overnight. The cake is still delicious even after stored in the refrigerator for a few days!

Thursday, March 20, 2014

On the Menu: Piroshki

The piroshki: Russian comfort food at its best.

Even our picky little Balin ate more than half of his.

Piroshki can be filled with any number of things: ground meats, rice, potatoes, onions, bacon...even chocolate and fruits for a dessert.

Since this was our vegetarian meal, our piroshki would be filled with potatoes, mushrooms, and onions. (Though someday I'd like to make meat-filled piroshki - sausage, mushroom, and onion in a Worcestershire sauce, maybe? Or a bacon, onion, and potato-stuffed piroshki with some red wine vinegar?)

Out of all the recipes I examined, I liked this one the most. The dough was delightfully soft and the filling was spiced perfectly. The author claims that you can fry these as well as bake them, but I've only ever baked them. I followed the original recipe faithfully, except for substituting Greek yogurt for the sour cream the second time I made them. The dough was still amazing.

I also found that the ratio of dough to filling was a bit off - that there was too much filling to dough. The second time I made these, I halved the filling and there was just enough. Feel free to play around with the ratios.

Piroshki (original recipe here)
Makes about 10

For the dough:
2 cups milk
4 cups + 8 tbs flour
2 eggs
2 tbs sour cream or Greek yogurt
2 tbs oil (I used olive)
1 tbs yeast
1 1/4 tsp salt
1/4 tsp sugar

For the filling:
3 medium potatoes, peeled, cooked, and mashed
1 small onion, finely chopped
1/2 stick butter
1 tbs olive oil
3/4 cup dried shiitake mushrooms, soaked in boiling water, drained, and chopped
salt and pepper, to taste
2 tbs finely chopped fresh dill or 1-2 tsp dried dill (optional)

1. For the dough: Whisk together 1 cup warm milk, 1/4 tsp salt, sugar, yeast, and 8 tbs flour in a large bowl. Cover and set aside for 10 minutes. It should rise and be foamy.
2. Meanwhile, mix together 1 cup warm milk, sour cream or yogurt, oil, eggs, and 1 tsp salt. Add 2 1/2 cups flour and mix together.
3. Add the foamy yeast mixture and combine. Then add the rest of the flour. Mix well.
4. Cover the bowl and place in a warm place until doubled in size, about 1 hour.
5. For the filling: Add olive oil and butter to a pan over medium-high heat. When the butter melts, add the onions. Saute until they have a carmel color.
6. Add the mushrooms and cook for another five minutes, stirring occasionally. Add salt and pepper to taste. Add dill, if desired.
7. Mix the onion mixture with the mashed potatoes and stir well.

Assembly:
1. Preheat oven to 350 degrees.
2. Cut a piece of dough about the size of a racquetball and place it on a well-floured surface. The dough will be very sticky, so use extra flour or a bit of oil to keep it from sticking to your fingers. Flatten the dough a bit.
3. Put about 1 1/2 - 2 tbs of the filling in the center of the flattened dough. Carefully pinch the sides together.
4. Place on a baking sheet, seam side down. Make the rest of the piroshki. The prioshki will expand in the oven, so space them accordingly.
5. Bake* for about 20 minutes, or until the tops are golden brown.
6. Serve by themselves or with melted butter and garlic.

* Check out the original recipe (here) for instructions on how to fry these.

Tuesday, March 18, 2014

On the Menu: Rassolnik (with leftover Black Bread)

How can you make stew any more amazing than it actually is?

Pickles.

It sounds strange, I know, but pickles in stew is delicious. The pickles add such a lovely tart taste that I almost wouldn't dream of not adding them to my next batch of stew.

Plus, it's a great way of using leftover relish (which, because of my crazy family and our canning adventures, we have plenty).

The boys were tolerant of the pickles, though Balin ate around them. Arthur was as surprised as we were that pickles were a good addition to stew.

Rassolnik (original recipe here)
Serves 8-10

For the broth:
10 cups water
1 lb beef, cut into bite-sized pieces
1/4 cup barley, rinsed
1/2 tbs salt, plus more to taste
3 medium potatoes, diced
1 carrot, thinly sliced

For the Zazharka:
1 1/2 cups dill relish
4 tbs olive oil, divided
1 carrot, grated
1 onion, finely diced
2 celery stalks, finely sliced
1 tbs tomato sauce
2 tbs fresh dill
2 bay leaves
1/2 tsp black pepper
sour cream (optional)
extra dill to serve (optional)

1. In a large pot, boil water, beef, barley, and salt for 30 minutes. Skim off any impurities that rise to the top. This is imperative to ensure that you have a lovely, clear broth at the end!
2. Saute the relish in 1 tbs oil for a few minutes. Add relish, potatoes, and sliced carrots to the pot and cook for an additional 10 minutes.
3. To make the Zazharka: Add 3 tbs olive oil to a large skillet and sauté onion for two minutes. Then add grated carrot and sliced celery and continue to sauté until carrots are soft (about five minutes). Stir in tomato sauce, then add this mixture to the soup.
4. Add bay leaves, black pepper, dill, and salt to taste. Continue to simmer for another two minutes, or until the potatoes have fully cooked. Serve immediately with a dollop of sour cream and a sprinkle of dill.

Sunday, March 16, 2014

On the Menu: Lobio with Black Bread

The best thing about this whirl-wind trip around the world is getting to indulge in some new foods. I love to cook and trying new recipes is somewhat of a challenge for me because I usually end up adapting recipes to my family's tastes before I actually make the original recipe.

I don't usually do this with breads, however. Breads are one of those things that generally require such precise measurements that if I fudge with the recipe without making a loaf first, I end up with a loaf of bread that no one eats because it's too...interesting.

I will readily admit that I was nervous about the black bread. It has a few questionable ingredients and I wasn't sure that my two boys (who, in reality, are quite adventurous foodies) would be able to handle it. I had my doubts about the coffee grounds. I had my doubt about the chocolate. I had my doubt about the caraway seeds. But what emerged from the oven was so beautiful and tasty, my mouth is watering a bit right now.

And the boys loved it, too!

We cheated a bit with the Lobio, as it is originally a Georgian dish, but it was very difficult to find a Russian bean dish that wasn't a soup. Although not everyone raved about this dish, I loved the flavor of the beans and ground walnuts and found the dish to be even better the next day, served at room temperature.

Lobio (original recipe here)
Serves 6

1 cup dried kidney beans, soaked overnight
1 cup walnuts (bits and pieces okay)
1 red onion, diced
1 tbs olive oil
2 cloves garlic, minced
1/4 cup red wine vinegar
1 tsp dried savory
1 pinch dried fenugreek
1/2 cup (total) of basil and parsley
salt and pepper, to taste

1. Simmer beans for about 1-2 hours until they begin to fall apart. Add more water as necessary.
2. Saute onions in oil until transparent.
3. Grind walnuts with salt, pepper, garlic, and the dried herbs.
4. Drain the beans, reserving about 1-2 cups of water. Add the onions, mixing well, then add the ground walnut mixture. Add additional salt and pepper, if needed. Add water a little bit at a time to make a sauce.*
5. Add the red wine vinegar and fresh spices. Mix well. Serve hot, warm, or cold. The longer the Lobio sits, the stronger the flavor.

*This is based on your personal preference, so add lots of water if you like sauce and just a little if you prefer drier foods.


Russian Black Bread (original recipe here)
Makes 2 large loaves 

4 cups rye flour
3 cups white flour
1 tsp sugar
2 tsp salt
2 cups bran flakes
2 tbs caraway seeds, crushed
2 tsp coffee grounds
2 tsp onion powder
1/2 tsp fennel seed, crushed
4 1/2 tsp yeast
2 1/2 cups water
1/4 cup apple cider vinegar
1/4 cup dark molasses
1 square (1 oz) unsweetened chocolate
1/4 cup butter
1 tsp cornstarch
1/2 cup cold water

1. Combine the rye and white flours.
2. Using a large bowl, mix 2 1/3 cups of the flour mixture, sugar, salt, bran flakes, caraway seeds, coffee, onion powder, fennel seeds, and yeast.
3. Combine 2 1/2 cups water, vinegar, molasses, chocolate, and butter in a saucepan. Heat over low heat until liquids are warm (butter and chocolate do not need to fully melt).
4. Gradually add the mixture to the dry ingredients and beat for about two minutes with your mixer. Add 1/2 cup of the flour mixture. Beat for another two minutes. Repeat until the mixture forms a soft dough. Let rest for 10 minutes.
5. Knead for about 10-15 minutes, then place dough in well-greased bowl, turning it so that the dough gets grease on the top as well as the bottom. Cover and let rise in a warm place, until doubled (about 1 hour).
6. When the dough has doubled, punch it down, remove from bowl onto a floured surface, and divide in half. Shape each half into a ball. Place the balls onto a large, greased pizza pan or two small, greased cake pans. Cover and let rise until doubled in bulk again (about 30 minutes to an hour).
7. Bake in a 350 degree oven for about 45-50 minutes.
8. While the bread is baking, combine the cornstarch and the ice water. Cook over medium heat, stirring constantly, until the mixture just begins to boil. Continue to cook for another minute. As soon as the bread is baked, brush the cornstarch mixture over the tops of the loaves. Return the bread to the oven and bake for another two or three minutes, until the glaze sets. Remove from the pans and cool on wire racks.

Friday, February 21, 2014

On the Menu: Dulce de Leche


When Robinson was a child, his parents would make this delicious treat for him and his brothers. 

Sometime during our courtship, Robinson made me dulce de leche in his parents' pressure cooker. At that point, I had never made anything in a pressure cooker before, so it was fun to see the transformation of sweetened condensed milk to a thick, caramel pudding. 

The boys loved it, too!

If you don't have a pressure cooker or can't borrow one, you might be able to find pre-made dulce de leche at your local specialty store or supermarket. 

Pressure Cooker dulce de leche
Serves 4


1 can sweetened condensed milk
4-6 tsp vanilla
dippers (apples, bananas, pretzels, and anything else that might be good with caramel!)
pressure cooker

1. Fill the pressure cooker with 1" of water.
2. Take the label off the can of milk and put it in the pressure cooker. Close and heat.
3. Get the pressure to 15 pounds. Process it at 15 pounds pressure for 15 minutes. Let cool.
4. Open the condensed milk can and scrape into a medium bowl. Add vanilla to taste. Eat with whatever dippers you'd like!

Wednesday, February 19, 2014

On the Menu: Locra with Chipas

Truth be told, it took a bit of searching to find an Argentinian meal with beans in it. (And in the picture it looks kind of like fassolatha, doesn't it? I promise it isn't!)

Locro is traditionally made with meat (beef or pork), corn, and other vegetables. It can be made with beans, squash, and onions as well. This soup is an exception to our usual vegetarian bean dish, as I made it with some pork shoulder I had in the freezer and some chorizo I bought at the store.

Another interesting component in this dish is hominy. We don't eat much hominy in our household - mostly because I don't have many recipes that include it - but the boys were quite taken with the soup, hominy and all. Even Balin, our pickiest eater, liked it.

The chipas is a bread made from mostly tapioca flour and cheese. It has a light, airy texture and complimented the hearty Locro nicely.

Locra (original recipe here)
Serves 12

1 cup dried small lima beans
1 cup dried chickpeas
1/4 cup olive oil
1 1/2 lbs pork shoulder, cut into 1" cubes
12 oz chorizo, sliced
1 large onion, finely chopped
6 cloves garlic, minced
1 tbs tomato paste
1 tsp dried oregano
1/2 tsp ground cumin
1 bay leaf
10 cups water
1 small acorn squash, peeled, seeded, and finely chopped
1 28 oz can hominy (white or yellow)
juice of 1 lemon (about 3 tbs)
1/2 cup thinly sliced green onions

1. Soak beans for 8 hours or overnight; drain.
2. Heat olive oil in large pot. When oil is hot, add pork in batches, cooking until browned. Season well with salt and pepper. Transfer to a plate.
3. Add chorizo and cook until fat renders. Add garlic and onion. Cook until soft.
4. Add tomato paste, oregano, cumin, and bay leaf. Return meat to pan with lima beans, chickpeas, squash and 10 cups of water. Bring to a boil. Reduce heat, cook until beans are tender, about 1 hour.
5. Add hominy and lemon. Heat through. Serve immediately sprinkled with green onions.

Chipas (original recipe here)
Makes approximately 15 rolls

1 egg
2/3 cup milk
6 oz Italian cheese, finely shredded
3 tbs butter, melted
1 3/4 cups tapioca flour
1 cup self-rising flour (or 1 cup all-purpose flour + 1 1/4 baking powder)

1. Preheat oven to 350 degrees. Grease a baking sheet and set aside.
2. Stir together egg, milk, cheese, and butter in a large bowl. Sprinkle in tapioca flour and self-rising flour; mix to form a dough. Knead for about 2 minutes, then roll into golf-ball sized pieces.
3. Place onto the baking sheet and bake until golden brown, about 12-15 minutes.

Monday, February 17, 2014

On the Menu: Matahambre

I think Robinson's father (affectionately known as "Oldpa" around here) was more excited about Argentina Week than the boys were.

He spent two years in Argentina for his mission and loves telling stories of his adventures and displaying the artifacts he brought home.

Oldpa also brought back a few recipes from Argentina and wanted to share his recipe for Matahambre (literally "kill hunger") with us. Gauchos would make this the night before and eat the cold leftovers while they were working.

Matahambre
Serves 6 to 8

2 lbs flank steak, butterflied*
1/2 cup red wine vinegar or red wine
1 tsp garlic, minced
1 tsp dried thyme
1/2 lb fresh spinach or kale
8 whole, cooked carrots
4 hard boiled eggs, quartered
1 onion, sliced 1/8" thick
1/4 cup fresh parsley (optional)
1 tsp chili peppers (optional)
1 tbs salt
3 cups beef stock
1-3 cups cold water
kitchen twine

1. Combine red wine vinegar or red wine, garlic, and thyme. Pour over flattened butterflied steak and let marinade for 6 hours.
2. Lay steak flat. Layer ingredients in the following order: spinach, carrots and eggs (alternate rows of carrots and eggs), onions, parsley (if using), chili peppers (if using), and salt. Roll into a cylinder and tie with kitchen twine at 1" intervals.
3. Place roll in a large roasting pan or casserole dish. Add stock and water to cover half way. Bake at 375 degrees for 1 hour. Serve hot or cold.

* Flank steak is already very thin, so you may have trouble getting your butcher to butterfly it. We ended up having to butterfly it ourselves. Robinson's mom used to pound it with a rolling pin to make it even thinner. The goal is to make the meat as thin as possible without getting holes in the steak.

Sunday, February 16, 2014

On the Menu: Roasted Vegetables with Cimichurri Sauce

It's a joke, isn't it, that Argentina has the most delicious pesto-like sauce? Of course, this sauce is suppose to go on top of meat, but we opted to enjoy this refreshing sauce on top of roasted vegetables.

Since there's still snow on the ground, we had to roast our vegetables in the oven - but if you live in a warmer climate, you certainly could roast them on the grill.

I'm curious to see how cimichurri enhances meats. Maybe one of these days I'll use it as a marinade or as a seasoning sauce, like I'm supposed to.

Roasted Vegetables with Chimicurri Sauce (original recipe here)
Serves 3-4 (as a main dish) 

For the roasted vegetables:
2 peppers (red, yellow, or orange - your choice)
1 medium zucchini
1 medium yellow squash
8 oz mushrooms
8 oz cherry tomatoes
1/2 lb asparagus
any other vegetables you'd like!
up to 1/4 cup olive oil (depending on the amount of vegetables you are roasting)
salt and pepper, to taste

For the chimichurri:
6-8 cloves garlic, peeled
2 cups parsley leaves
1/4 cup oregano
2 tbs red wine vinegar
salt, to taste
1/2 cup olive oil

1. Preheat oven to 450 degrees. Prepare the vegetables for roasting, except for the cherry tomatoes. Pour olive oil over the vegetables and sprinkle with salt and pepper. Coat vegetables well with the olive oil. Put in oven. Set timer for 10 minutes.
2. In the meantime, prepare the chimichurri. Add garlic, parsley, oregano, and red wine vinegar into a food processor and process until everything is finely chopped. Add the salt and olive oil and process again. Pour the chimichurri into a bowl.
3. Check on the vegetables and if they are almost finished, add the cherry tomatoes. Roast for another 5-8 minutes.
4. Remove the vegetables from the oven and toss well with the chimichurri.

Thursday, January 23, 2014

On the Menu: Fassolatha and Kalamata Olive Bread

When I was in Greece, I can't recall eating a dish with beans in it. I must have, certainly, but I can't remember doing so.

I mean, I ate pizza in Naxos!

But no beans, I guess.

I'm disappointed because apparently, the Greek national dish is fassolatha - a soup made with beans and other vegetables.

Our stubborn two year old (who insists that he likes beans only to snub them at dinner) was much more excited about the kalamata olive bread I made to accompany the soup.

I found both recipes from the website Lemon and Olives (an excellent resource if you've yet to find Greek food you like!) and tweaked them a bit. I've recopied the recipes here with my modifications and also linked to the original recipes.

Fassolatha (original recipe here)
Serves 6-8

1 lb navy beans (soaked for at least 6 hours before cooking)
1 tbs. olive oil
1 onion, chopped finely
2 celery stalks, chopped finely
2 carrots, diced
1 tsp. dried thyme
1 14.5 oz can petite diced tomatoes
1/4 cup fresh parsley
5 cups water
salt and pepper to taste

1. Soak beans for at least 6 hours.
2. Sauté onion, carrots, celery in a large pot or Dutch oven for five minutes.
3. Add thyme, undrained tomatoes, half of the parsley, drained beans, and water to the pot. Add salt and pepper. Bring to a slow simmer.  
4. Simmer for about an hour, or until beans are soft. Serve immediately with the rest of the parsley sprinkled on top.


Kalamata Olive Bread (original recipe here)
Makes 1 large loaf

2 cups all-purpose or bread flour
1/2 tbs. yeast, mixed with 1 1/2 tbs water to activate
1/2 cup kalamata olives, chopped
1/2 tsp garlic powder
1/4 tsp. salt
1 tbs. honey
1 1/2 tbs. olive oil (plus extra for coating)
1/2 tsp Rustic Italian seasoning blend (or rosemary if you can't find something comparable)
1 cup warm water

1. Activate yeast in 1 1/2 tbs water, if needed. Let sit for 10 minutes.
2. Add all ingredients to yeast, mix well. Knead for 8-10 minutes, or until a soft dough forms. (I use my Kitchen Aid for this part!)
3. Coat a large bowl with olive oil. Put bread in the bowl and coat top of bread with a little more oil. Cover and let rise in a warm place for 1-2 hours, or until doubled in bulk.
4. Remove bread from bowl. Place onto a cookie sheet and shape into an oval. Cover and let rise in a warm place for another 30 minutes.
5. Preheat oven to 350 degrees. Bake for 30 minutes. Brush with olive oil for the last five minutes of baking. The bread should be golden brown when done.

On the Menu: Baklava

I certainly hope baklava makes the "things you think of when you think of Greece" list.

Honestly, how could it not? Nuts + sugar + honey + butter + filo dough = AWESOME!

I had just enough of leftover phyllo dough to make these yummy treats. The boys were skeptical about them at first...but they ate it up! It was a nice way to end Greek Week.

The baklava didn't survive the next morning. (Guilty. Very guilty.)

Baklava (original recipe here)
Serves 4-6 (or if you are gluttons, serves 3)

4oz filo dough (half package)
1/4 lb chopped walnuts, almonds, or pistachios (or a mixture)
1/4 cup butter, melted
1/4 tsp ground cinnamon
1/4 cup water
1/4 cup white sugar
1/2 tsp vanilla
2 Tbs honey

1. Preheat oven to 350 degrees. Butter the bottoms and sides of a bread pan (either a 8.5 x 4.5 or 9 x 5 is fine).
2. Finely chop nuts and mix with cinnamon. Set aside.
3. Unroll filo dough and cut in half to fit pan. Cover with a lightly dampened cloth to keep from drying out as you work. Place 2 sheets of dough in the pan, butter, and repeat until you have 8 sheets layered.
4. Sprinkle nut mixture on top layer.
5. Cover with another 8 sheets of dough, buttering every 2 sheets (just like you did to the bottom layers).
6. Using a sharp knife, cut diamond or square shapes through the baklava to the bottom of the pan. Bake for about 25-30 minutes, or until golden and crisp.
7. Make sauce in the last 5 minutes of baking: boil sugar and water until sugar has dissolved. Add vanilla and honey. Simmer for five minutes (mixture will thicken slightly).*
8. Remove baklava from oven and spoon sauce over it immediately. Let cool.

* I made the sauce right after I put the baklava in the oven...which turned out to be a big mistake. The glaze became too thick to spoon on top of the baklava.

Wednesday, January 22, 2014

On the Menu: Lamb Gyros with Tzatziki and Sweet Potato Fries

I have a butcher.

I'll admit it sounds kind of funny, a throw-back to the 1950's when a housewife had a local grocer and butcher. They knew not only her name, but the foods she bought and the cuts of meat she liked. 

The fact I have a butcher fills me with vintage nostalgia. 

My husband, on the other hand, thinks it is hilarious.

My butcher was out of lamb, but promised he could special order it and have it available by Monday. 

Products from lamb and goats are quite popular sources of foods in Greece. In fact, remember the goat herder I mentioned in a previous post? He wanted to slaughter and roast a goat for us to eat in celebration at the completion of the dig. (Rumor had it, the Americans complained. So much for a unique cultural experience!)
Some people, however, don't like lamb. It does have a strong flavor. If lamb isn't your cup of tea, then substitute beef or turkey for the lamb in this dish.

Lamb Gyros
Serves 4-5

naan or gyros bread (I make naan bread; the recipe is here)
2-3 medium tomatoes 
tzatziki (recipe follows)
kalamata olives (optional)
sprouts (optional)

For the meat:
1 lb. ground lamb (or substitute)
1/2 onion, minced
1/2 tsp. rosemary
1/2 tsp. oregano
1 clove garlic
salt and pepper, to taste

1. Preheat oven to 350 degrees. 
2. Mix the meat, onion, rosemary, oregano, garlic, salt, and pepper into a medium bowl. Form into a meatloaf and put into a bread pan. Bake for about 40 minutes, or until cooked through.
3. Once the meatloaf is cooked, remove from oven. Increase the oven heat to 400 degrees.
4. Slice the meatloaf thinly. Place strips onto a cookie sheet or large pan and bake for an additional 10 minutes. The meat should be somewhat dried out, but not too crunchy. 
5. Serve meat on naan bread with tzatziki, tomatoes, and sprouts. 


Tzatziki
Serves 6-8

1 large container plain Greek yogurt* (I like Fage)
2 cucumbers, grated*
1 large clove garlic
1 tsp. white vinegar
dried mint (optional)

1. Mix the yogurt, shredded cucumbers, garlic, and vinegar in a medium bowl. 
2. Sprinkle dried mint on the top. Serve immediately.

* Due to the popularity of Greek yogurt, most supermarkets now carry a brand of Greek yogurt. I prefer Fage because it doesn't taste bitter. (I've tried many generic brands and they taste terrible.) If you can't find a brand you like, you can make your own! Take a container of plain yogurt and strain it through several layers of cheesecloth. The longer you strain it, the thicker the yogurt will be. My favorite brand to strain is Mountain High plain yogurt.

** I like to squeeze the extra water out of the cucumbers. This makes the tzatziki less soupy.

Monday, January 20, 2014

On the Menu: Spanakopita


Preparing the spanakopita.
Spanakopita is probably my all-time favorite Greek dish. The flavors are wonderful and it is fairly easy to prepare. If you are short on time, you can even make these in advance and freeze them until you are ready to bake them.

The boys love "painting" the butter on with the marinade brush.

They also love eating the filling. (But I'm also guilty of that!)

Spanakopita
From: Moosewood Cookbook by Mollie Katzen
Makes 1 large pie or about 20 pockets

1/3-1/2 cup olive oil (for the filo) - I use butter
1 lb. filo (or phyllo) pastry*

Filling:
1 tbs. olive oil
2 cups minced onion
1/4-1/2 tsp. salt
1 tsp. basil
1 tsp. oregano
2 1/2 lbs. fresh spinach, stemmed and finely chopped**
5 medium cloves garlic, minced
3 tbs. flour
2-3 cups (packed) crumbled feta cheese
1 cup cottage or pot cheese
black pepper, to taste

1. Preheat oven to 375 degrees. Oil a 9x13" baking pan.
2. Heat 1 tbs. olive oil in a Dutch oven. Add onion, salt, and herbs and sauté for about 5 minutes, or until the onion softens. Add spinach, turn up the heat, and cook, stirring, until the spinach wilts (5 to 8 minutes). Stir in the garlic.
3. Sprinkle in the flour, stir, and cook over medium heat 2 to 3 more minutes. Remove from heat.
4. Mix in the cheeses. Taste to correct seasonings, adding lots of black pepper.
5. Place a sheet of fill dough in the oiled pan, letting the pastry edges climb up the sides. Brush lightly with the oil and add another sheet. Keep going until you have a pile of 8 sheets. Add half the filling, spreading it to the edges, then repeat with 8 more sheets of oiled fill, followed by the remaining filling. Layer the rest of the fill over the filling, brushing oil in between. Oil the top, tuck in the edges, and bake uncovered for about 45 minutes or until golden and crispy. Cut into squares and serve hot or warm.

Looks amazing!
Filo dough is fairly easy to work with. Keep it covered with a moist cloth while you're working with it because it will dry out and become too brittle to handle if you don't. Piecing filo dough is not for a noob chef.

In Fairbanks, Alaska (of all places) there was a fabulous Greek restaurant: Bobby's. They had delicious spanakopita, but there was an extra seasoning in it. I'm not sure what it was, but I suspect it was juniper or nettles, both spices in traditional Greek cooking. Their availability may be limited in the States. Thank goodness for the Internet!

* I usually cut the fill dough in half and make little spanakopita pockets. (You can see these in the picture.) To do this, cut the fill dough in half. You'll want two piles of long filo strips. Layer three pieces of filo, buttering in between each sheet. Put approximately 2-3 tbs. of filling in the left corner closest to you. Fold into a triangle shape over and over again until you finish at the upper left corner. Butter the top and carefully transfer the pocket to a cookie sheet or baking pan.  

** My local grocery store does not carry fresh spinach. Yeah, weird, right? I use 2 1-lb. bags of spinach as a substitute. Just thaw, gently squeeze out the excess water, and mix with the rest of the ingredients at step 2.